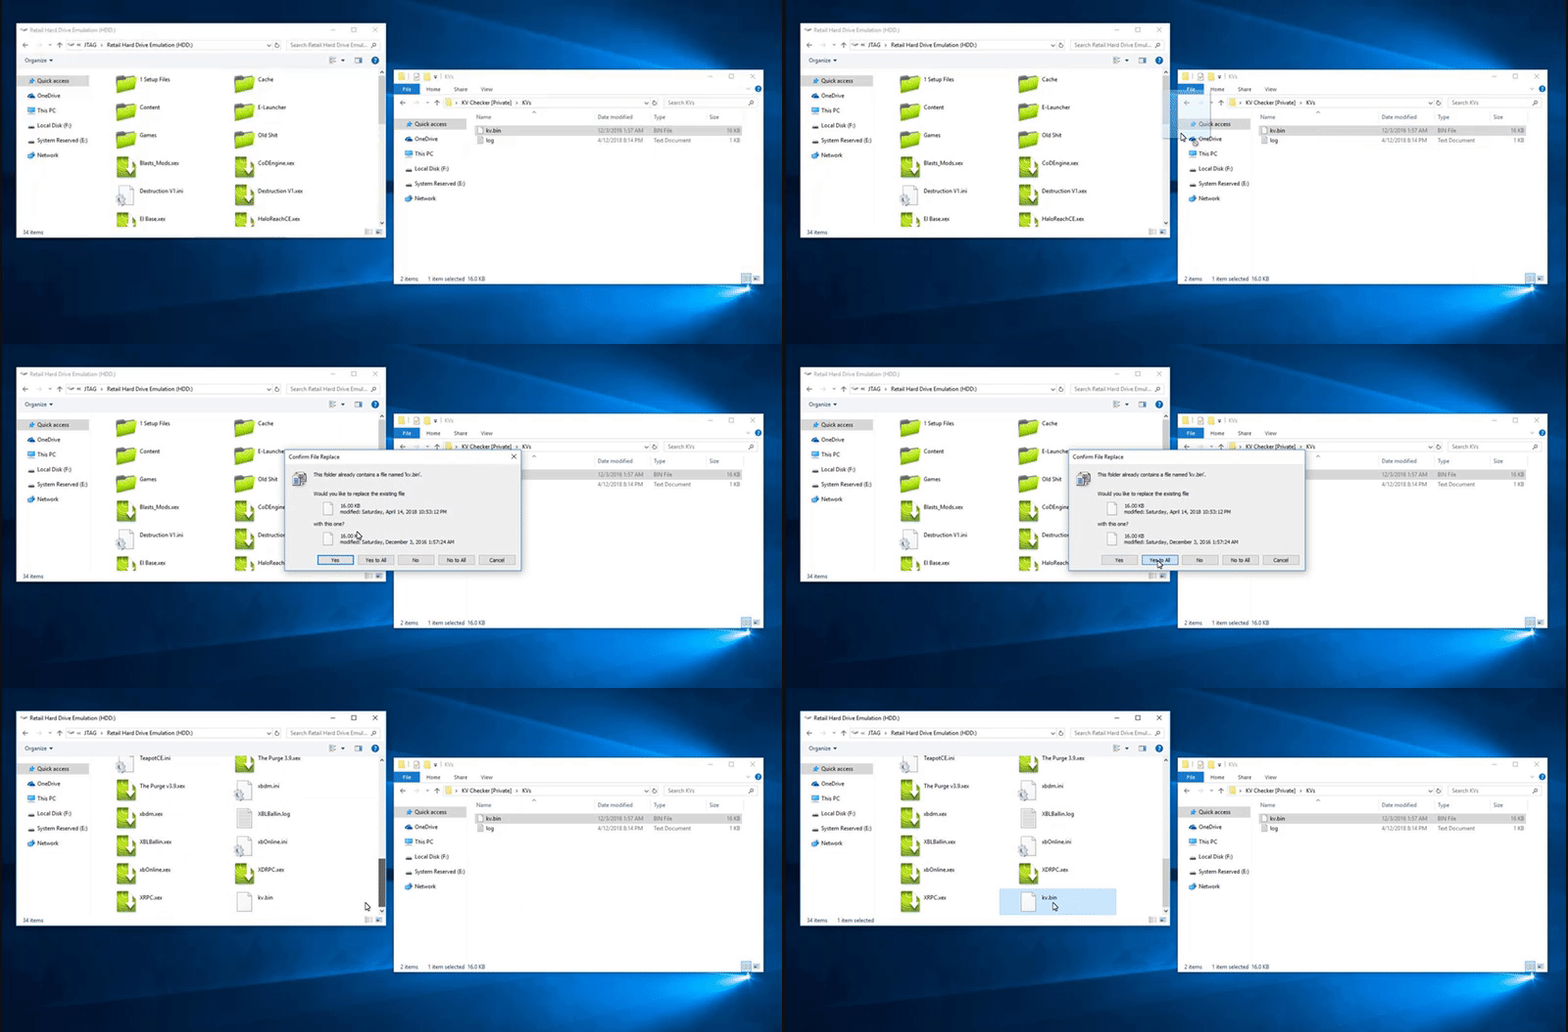
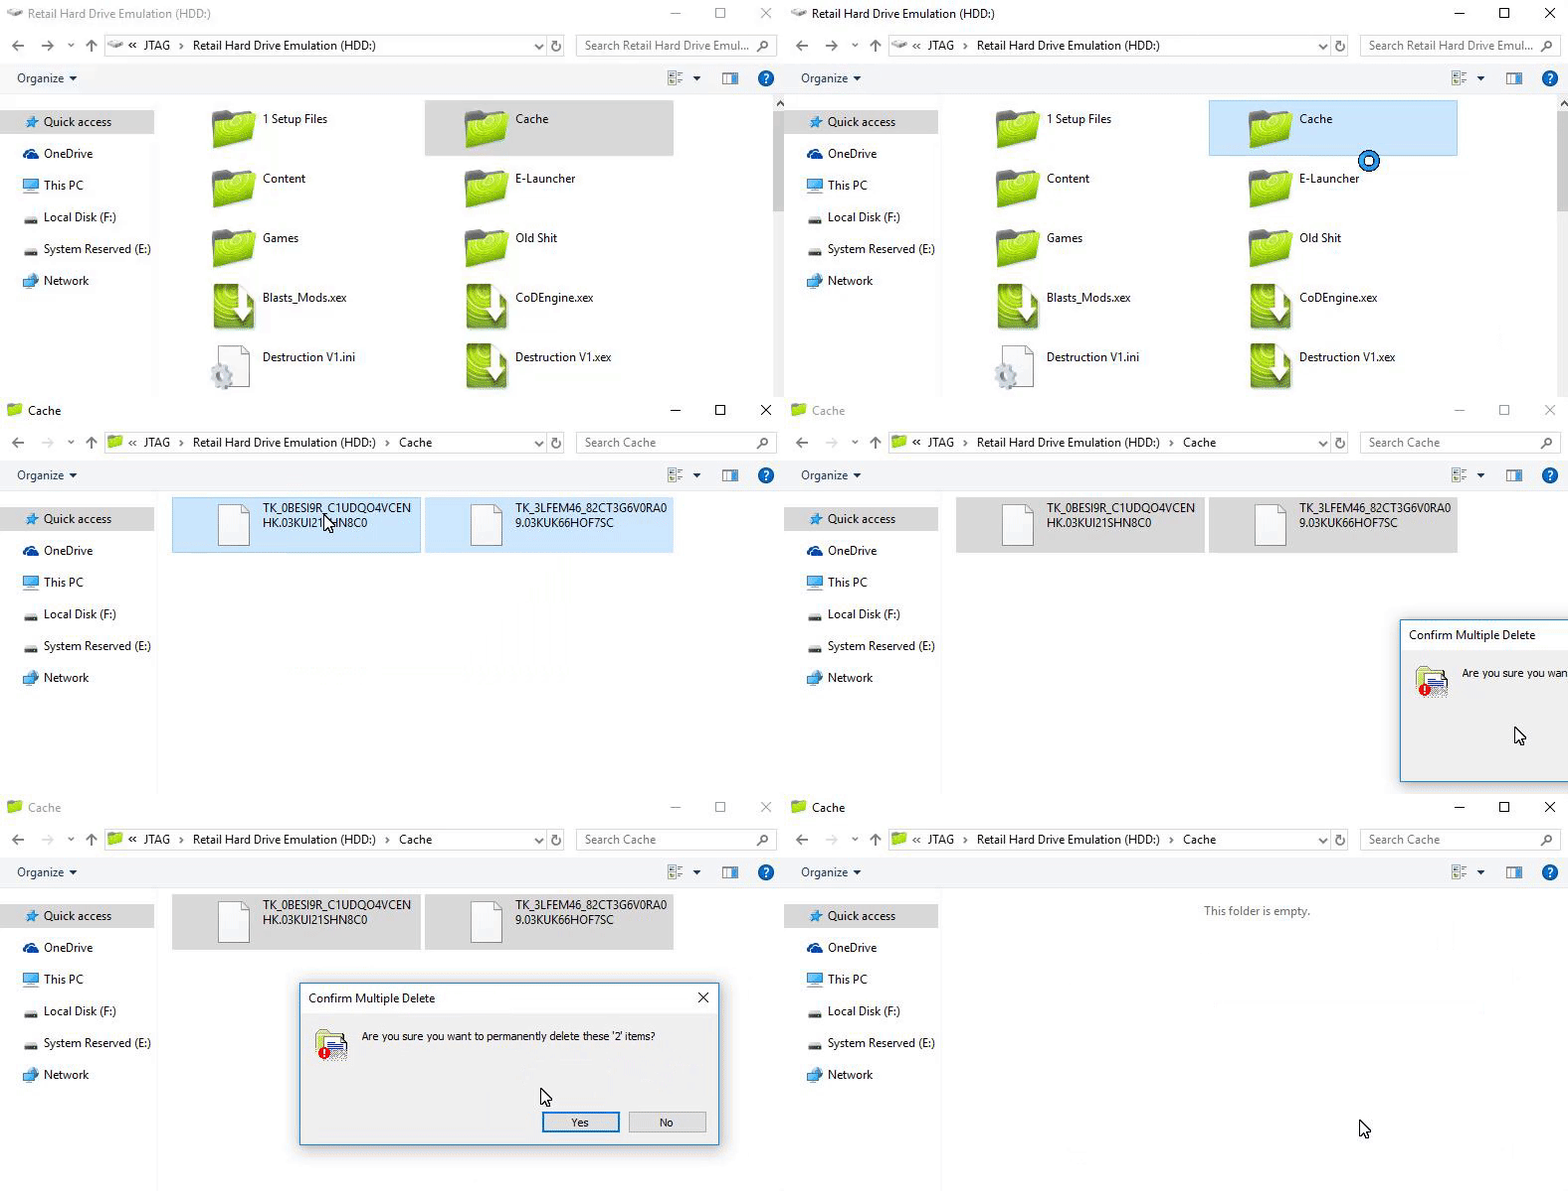
When you swap a banned KV for an unbanned KV, often times the banned KV will remain in your system cache, which will cause your console to still be shown as “banned”, even when you boot with a new KV. To avoid this, we highly reccomend that you follow this procedure every time you load a new and unbanned KV to your console.
In this example we will be using Neighborhood and an internal hard drive (both recommended).
Step 1 – Load your new KV.bin and cpukey.txt by moving the files from your PC to your console’s hard drive via Neighborhood. If prompted to overwrite files, select “Yes to All“.

Step 2 – Open the “Cache” folder on the root of your hard drive and delete all of the files inside the folder. If you receive errors, just ignore the remaining files as they will be cleared when you reboot your console later.

Step 3 – From your console’s dashboard, navigate to Settings > System > Storage

Step 4 – Ensure that “Hard Drive” is selected, and press “Y” on your controller

Step 5 – Select “Clear System Cache” from the menu (be sure that you do not select “Format”, or your hard drive will be completely erased).

Step 6 – Select “Yes” when asked to confirm clearing the system cache

Step 7 – Repeat steps 5 and 6 until you’ve cleared your cache 3 times in total.
Step 8 – Reboot your console using the power button
Your console should now be unbanned
Tut by HeliosKV's


